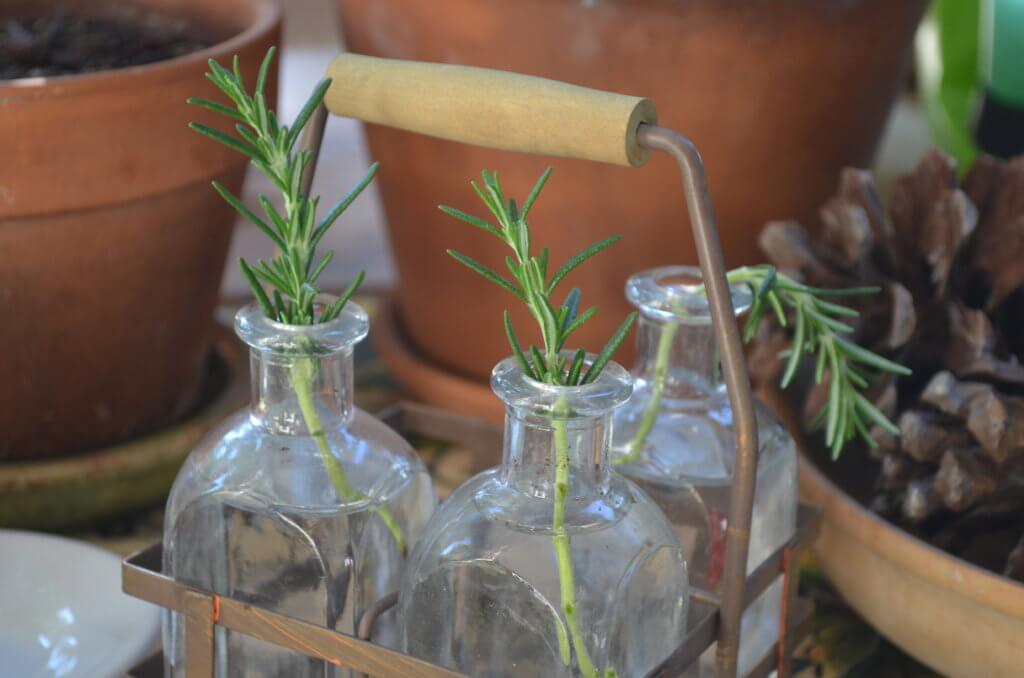
If you’ve ever taken one whiff of a fresh rosemary leaf, you won’t have forgotten the purely ephemeral aroma, the seemingly medicinal aroma that lasts longer in the air than most other herbs. That’s why it’s my absolute favorite fresh herb to have around, although it’s not always been easy for me to grow so I’ve had to learn over the years how to grow it indoors while I was in the Midwest. In the Mediterranean climates, of course it grows wild and huge and can withstand colder Med temperatures, but not freezing ones. You can recreate similar environments indoors, anywhere in the world.
All you have to do is clip cuttings from any rosemary plant or bush. Rosemary can get woody, so be sure to only cut stems from fresh, green ones. Once you’ve done that, take all of the bottom leaves from the stem and place each one in a separate small vase of water or several into a larger one. If your room is on the colder side, place a plastic bag on top to give it a bit of a greenhouse effect. Wait for some roots to grow (be patient, it could take a few weeks), and be sure to refresh the water every few days.
A lush and green rosemary plant is the kind to take cuttings from for healthy and successful propagation.
Once the stems have rooted, you can plant each one into their own pot with organic potting soil or compost with a little perlite for aeration. Soon you’ll have your very own rosemary plants, for free!
I made this video during the last few months I was in my house in Chicago. It was long before I accepted that I would have to leave that beautiful place, a home and land surrounding it that was everything I had ever wanted to produce my vision of a true food forest and permaculture garden (more about permaculture below and in the second video).
I’ve since moved abroad and still think about that place because it had all the elements that would afford a wonderful self-sustaining home and lifestyle. It still makes me very sad to think about what I had to leave, but it has also made me realize that if you have a little land or some pots to put outside, this can be done everywhere because it’s all about planting and becoming self-sustaining, no matter where you are. If it’s something you want to do then go for it, wherever you are in the world.
“Permaculture, originally ‘Permanent Agriculture’, is often viewed as a set of gardening techniques, but it has in fact developed into a whole design philosophy, and for some people a philosophy for life. Its central theme is the creation of human systems which provide for human needs, but using many natural elements and drawing inspiration from natural ecosystems. Its goals and priorities coincide with what many people see as the core requirements for sustainability.”Permaculture tackles how to grow food, build houses and create communities, and minimise environmental impact at the same time. Its principles are being constantly developed and refined by people throughout the world in very different climates and cultural circumstances.
In the first video, I describe the perennial plants that I purchased and why I’ve bought them. You’ll also get a glimpse of my beautiful Tortie cat, Saudah. She used to love sitting at that window and getting some fresh air. She’s not an outdoor cat and couldn’t ever be in that house because we used to have coyotes, hawks and other animals that could have been of danger to her.
Part 2 is a little longer and shows you more of the space I had and the surrounding natural beauty and the peace that comes with it. I’ll try to recreate that again, although it will not be so easy, it’s not impossible, either.
I hope you enjoy the videos and would love to hear your comments below or at the youtube videos themselves. Thanks for watching and please don’t forget to subscribe to my channel!
The first time I traveled to southern Turkiye (specifically Fethiye), I was completely and utterly taken in by how perfectly the botanics, the landscape and the climate appealed to what I had always wanted in a place. All of my adult life (or actually before that), I’ve been completely and utterly obsessed with the Mediterranean lifestyle and all the things that come with it: the great food, the beautiful surroundings, and the near-perfect climate (for me) – except for the very hot summers…
So when I decided to come here for long-term, although not knowing if it would be permanent or not, I knew that I was going toward a dream to put myself in those surroundings, most of which involved things like lemon, orange, olive, and pomegranate trees. They are symbols of the Mediterranean landscape and the food that has become an integral part of this thousand-year old rich cuisine.
That said, a few months after I came and realized I would be staying at least a little longer, I began to populate my balcony with potted plants to create my own little container garden. Here’s a video describing a little more about my neighborhood and the plants I’ve brought home (although that was last summer). They’re all much bigger now and I’ve moved location after realizing that direction was too hot and harsh for almost all of those plants, but this is how I got started:
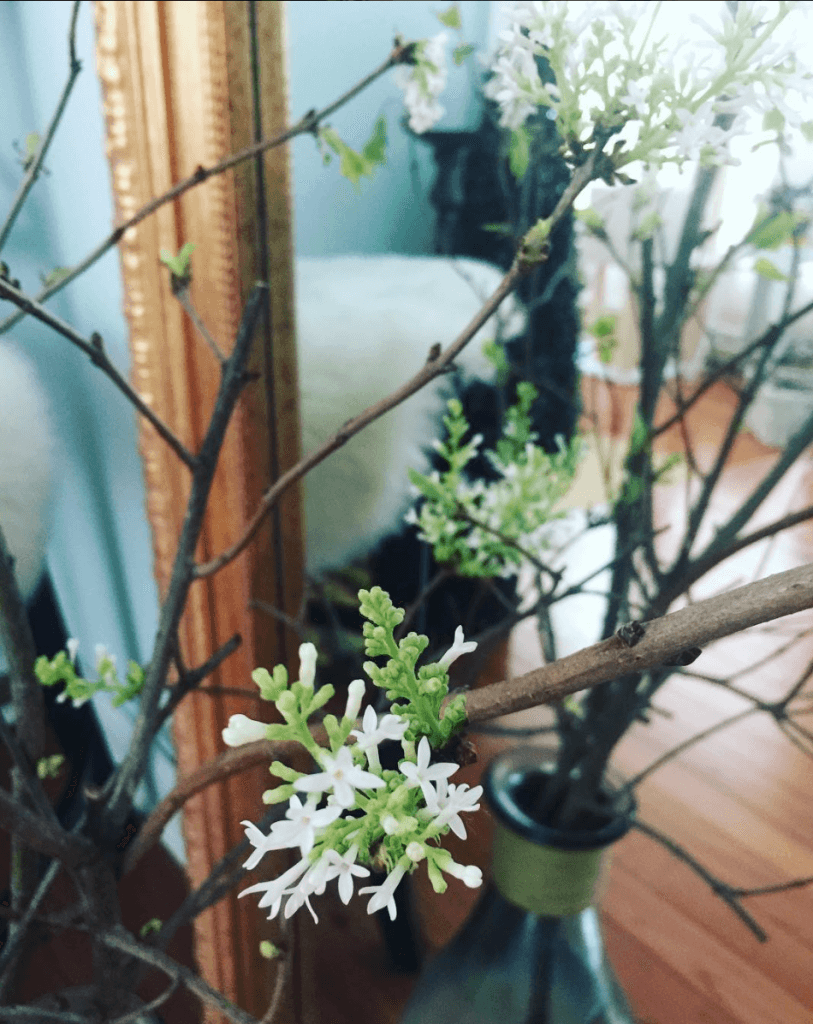
Every winter I try to continue my obsession with indoor gardening. It usually happens after I get antsy with the realization that I can’t put anything into the ground with all the snow that surrounds me, but I persist in finding ways to keep my thumb green. That usually means forcing bulbs of some sort. It can be amaryllis or narcissus– bulbs (learn how to force those in this post) which can be found at all sorts of garden centers and even hardware stores or on Amazon. Sometimes they’re pricey; sometimes not. But if you have a yard (or legal access to one) with trees that flower in the springtime, you can do this type of forcing of tree branches– for FREE!
I originally wrote about doing this many years ago here when I did it a rather complicated way, or at least it took a bit more time because I thought I should soak the branches in water before putting them in a vase. This time, I simply didn’t have the patience for all of that after taking a nice long walk outside (which was nice and peaceful) because I picked so many branches off my lilac trees that it took a while to clean them up (cutting off all the dead leaves) that I just wanted to get them in their vases instead of soaking them in a bucket and waiting to display them.
I knew I was taking a chance that they might not bloom, but they actually did- and faster than before! They bloomed so well in just a few days that it brought instant life to my home. At first, they bloomed green leaves and then white blooms looking just like the lilac flower itself. It’s been absolutely heavenly- and super easy to do.
I hope I can persuade you to do the same, with whatever type of tree branches you have outdoors that you want to bring inside.
Here’s how to force your tree branches:
Use a clean garden knife (yes, dirty knives can transmit diseases in trees) to cut the branch of your desired tree. Cut on the angle. Collect as many branches as possible.
Bring the branches indoors and snip off any type of small, dead twigs. Fill your vases with cool water, then arrange the branches according to how you’d like to see them, giving them some space to bloom. Change the water every few days to keep the branches healthy and giving them the best chance at blooming successfully. Keep in indirect light.
I’m never happier throughout the year then when it’s time to start gardening. You can ask anyone around me who sees the pure joy I have when it’s time to look through seeds and especially visit local nurseries (or any that I happen to be near).
It’s a must to see all the greenery and pop of color!
And I usually get a tiny bit carried away and want to take all the baby plants home.
When it comes to gardening, whether indoors or out, I can completely relate to people who express overwhelm about getting started or keeping a garden going. Most are also disillusioned when things don’t grow properly and attribute their so called ‘failures’ to not having a green thumb.
This makes me so sad, because gardening is one of the most pleasurable and fail-safe activities you can do. There is so much experimentation involved in gardening and more often than not you just have to ask the right questions about the space you live in or will grow your plants in to find the right type of plant for you. That usually means visiting a nursery with knowledgeable people and not just any old big box store that sells plants.
There’s also the reality that you need the right tools- not a lot of them, but you do need some. Just like with cooking, you can get by with few but they should be high quality and the right kind for essential and basic cooking/gardening. I’m not someone who loves a lot of stuff (anymore), and when it comes to gardening I’ve pared it down to only the essentials I need to get me started and keep me going throughout the gardening season. Here are the 7 most essential tools I use to get started gardening in the Spring gardening both indoors and out and I tried to go in order of the gardening process:
1. Compost Bin
I like the Oxo Good Grips Compost Bin a lot. It’s small enough to fit on a counter top or under the counter in a cabinet. The way it works is that you put your kitchen scraps into it (the lid stays up, which is a small but important detail when you’re dealing with food excess) close the lid and when it’s time to put into your compost pile, it’s easy to dump out and clean- that is a must! For our family it fills up every couple of days, which is fine- I wouldn’t want to keep scraps any longer than that.
2. Garden Scissors
I have a lot of garden scissors, or shears but they don’t all work the same. Some are stronger than others and some are longer than others, too. Again, another great Oxo product is the garden scissors. I’ve been using them in my early Spring gardening this year and I’m really surprised at how comfortable and versatile they really are. I use them to cut up my kitchen scraps for the compost bin (that makes decomposing much quicker), but I’ve also used it to prune my lilac tree stems (not tough branches), thyme plants (which are quite woody) and my Munsted lavendar plants. So far, so good. They don’t call these products ‘good grips’ for nothing!
3. Watering Can
No matter if you’re indoor gardening, balcony gardening or outdoor gardening, you need a watering can. Don’t even try to attempt filling mason jars, yogurt containers or large buckets- they just make a huge mess and drown your plants, whether they’re delicate or not. Again, my Oxo product recommendation here is for a reason- their Indoor Pour & Store Watering Can is functional and easy to store- how smart is it that the spout actually folds inward so when you’re done watering, it doesn’t take up all that extra space in your gardening area? For folks with apartments or other small storage areas, this is perfect. I simply love the fact that it’s not bulky, plus the spout is like a gentle waterfall over my plants and delicate seedlings, which is what I worry most about when planting for the first time each Spring. There is also one for Outdoor use.
4. Mini Hand Tiller
I love, love, love my little hand tiller. I also have an upright larger one which I’ve used a lot, but the small hand one is perfect for times when you just want to get on your hands and knees and till a small portion of the garden and pick out those weeds. It’s quite therapeutic! I got mine at Marc’s stores for just $1.99 when I was in Ohio, but I think a quick Amazon search should lend some good results, although probably not at that price!
5. Rake & Hoe Hand Tool
I love this tool because it’s a two-for-one. Since I trug along a lot of tools all the time, I want to carry as little as possible. Plus, this tool is super useful. I use it after tilling and before transplanting. I use the hoe part to hack at really stubborn roots and weeds and the rake to continue to get out any leaves that still remain in the soil, plus turn the soil around a little more. It’s one I won’t go without anymore.
6. Transplanting Trowel
I go through hand trowels like crazy. I have vintage ones, metal ones and ones with delicate wood handles. Maybe I just have strong hands and use too much pressure when digging, but I tend to bend them pretty easily. That said, I need something strong and durable, but also comfortable and easy to grip when wearing garden gloves. Again, Oxo Good Grips come to mind because of their excellent Transplanting Trowel (seen below on the left). I’ve been using it when transplanting small herbs and veggies and it’s just the right size and grip for my needs.
Once your plants get larger or you’re transplanting something large to begin with (i.e. grown tomato plants, small trees, etc.), you’ll need a large spade or garden shovel to cut into the ground and turn it over while also digging depth into the ground to place your plant. You just can’t do this with a small trowel- or at least you absolutely shouldn’t!
That’s my list- is there anything else you would add to it?
Check out more ways you can use Oxo gardening tools by searching hashtag #OxoSpringGardening on Twitter and Instagram