by Yvonne Maffei | Feb 22, 2016 | Crafts, Natural Living
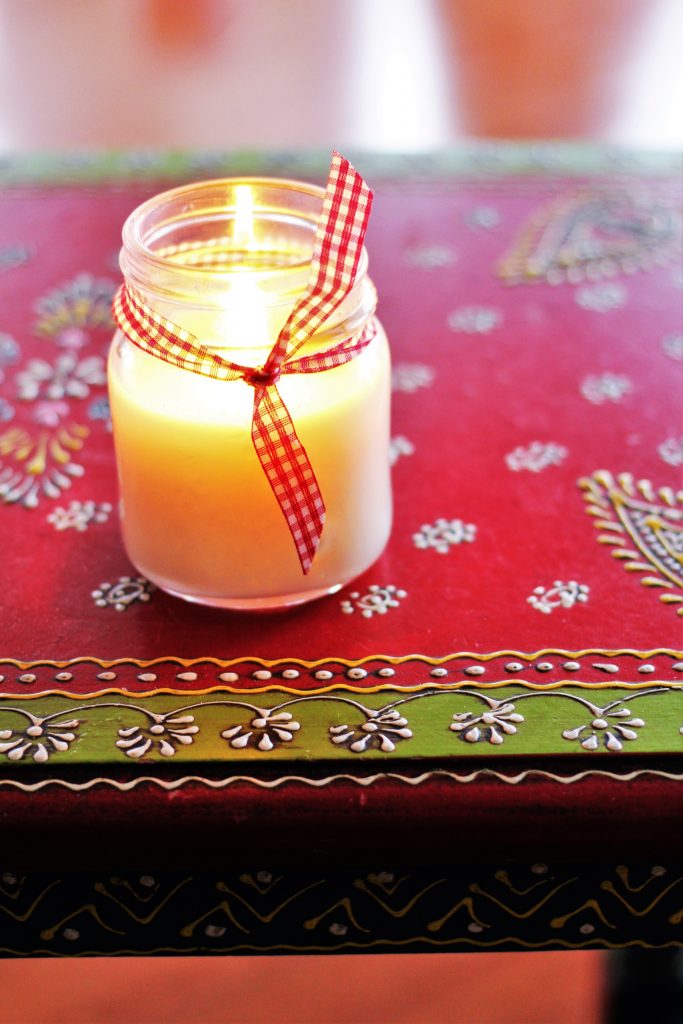
Winter came a little too late to many parts of North America this year. But when it came, it came with a big bang…and lots of snow. While some people were super excited, others were…well…not so much!
One thing I personally love about winter is the cozy atmosphere you can create inside the home. With thick blankets, extra pillows and heavier curtains, your room can transform into a warm safe haven during the blistery cold temperatures outside. Plenty of hot cocoa and coffees can do the trick, too!
During this season, I also like to make handcrafted soy candles to burn throughout the longer winter nights. The added benefit of using soy wax as opposed to paraffin wax is it lasts much longer and is better for the environment producing up to 80% less soot. Soy candles are very easy to make and I’ll show you how!

Here’s what you need…

Materials:
- soy wax flakes
- large mixing bowl
- large pot
- spatula
- medium size pot
- glue gun/glue sticks/hot plate
- small glass mason jars (or your choice of containers)
- clothing pins
- tabbed candle wicks
- drinking straw
- fragrance oil (phthalate-free is best)
The soy wax, tabbed candle wicks and fragrance oils can be found at your local craft store. I would highly recommend you use phthalate-free fragrance oils which are better for your health. The rest of the materials can be found at any dollar store. You can get creative with the type of jar or container you’d like to make your candles in. Old tea cups and small deep ceramic bowls can also be great options. For this project, I’m using cute mini mason jars.

Preheat your glue gun. To avoid surface damage, keep a hot plate or newspaper under the gun as it heats so the glue doesn’t drip onto your work surface. I have a small metal plate I’ve dedicated to this purpose.
To start, insert a tabbed wick into the straw. Using the hot glue gun, carefully add a small dab of glue on the metal tab of the wick. The straw helps keep the wick stable as you prepare to glue it into the jar.

Carefully, adhere the metal tab to the center of your container, using the straw as a guide. Press down and hold for a few seconds. Then gently remove the straw. Repeat for the rest of your containers.
.
Create a double-boiler by adding a shallow amount of water to your pot and placing the large mixing bowl on top. Heat over the stove on medium until the water gently boils. Add soy wax to your mixing bowl.
To measure the correct quantity of wax for your containers, fill the container with wax twice and empty into the mixing bowl for melting. This is enough wax for one jar. Repeat until you have enough for each of your containers. For example, I was making 4 mason jar candles so I filled the jar 8 times and placed it into the mixing bowl. This was enough for my 4 candles.
IMPORTANT: Have a mixing bowl and utensils reserved just for candlemaking. You do not want to use a vessel which is intended for eating. I have separate instruments, including bowls, spatulas, etc, I use for all my non-edible projects such as candles.

Once the wax has melted, remove the mixing bowl from the heat and add your fragrance. Add enough until you are satisfied with the scent. Make sure you don’t put too much oil as it will not mix into the wax. A rule of thumb is using 20-30% the amount of wax you have for our fragrance.

Using a spatula, stir the wax and fragrance oil until it is fully blended. The wax will look uniform in appearance.

Now, carefully add your soy wax into each of your jars. Do not fill to the top, leave about 3/4″ inch from the rim.

Carefully, center the wick with the clothing pins. Now let it rest for about 1 hour, until the wax has fully hardened.

Let the candles cure for 24 hours. Then trim the wick about 1/4″.
TIP: Always trim your wicks to 1/4″ for ideal and even burning.

Light your candle and enjoy hours of burning for an aromatic experience!

Now make yourself a hot cup of cocoa, wrap yourself in a cosy blanket and immerse yourself into good book with your candle nearby!
SH
Sobia Hussain is a professional soap artisan who runs The Olive Tree Soap Company located in Toronto, Canada. She creates vegan natural soaps and skincare products with an eco-conscience. She is also a writer for various international publications. Sobia loves teaching creative Discovery Workshops designed to help children discover their inner talents and inspire creativity through explorations in art and science.
by Yvonne | Aug 23, 2012 | Giveaways
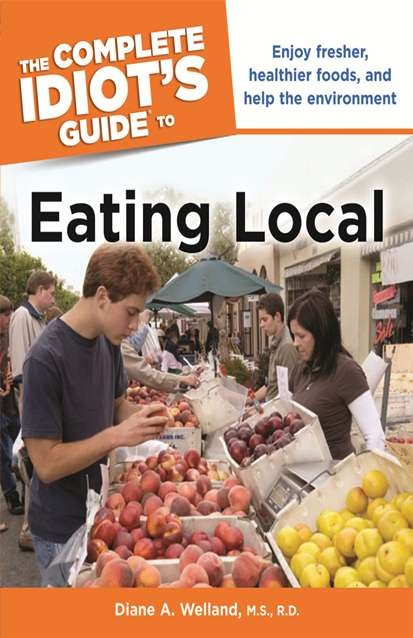
Local food products are quite the buzz lately. Any time you shop at the supermarket and see products like local honey or local jams, they’re typically strategically placed where fresh produce is to give you the feeling of shopping at an outdoor market. Speaking of those, farmers markets are the place to be on a Saturday morning where local products abound and purchasing them is seen as one of the best ways to support small business, community and environment.
(more…)
by Yvonne | Jul 1, 2011 | My Favorite Things
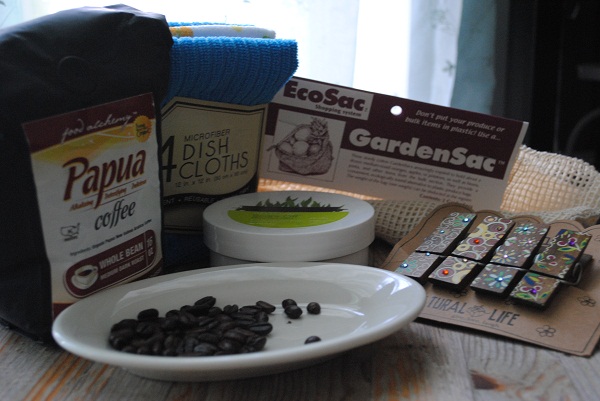
I’ve been gifted a few things recently that I love so much and really want to share with all of you. They make great gifts because not only are they cute and clever, they’re useful and beneficial, too.
Microfiber Dish Cloths. These no-name dish cloths are not only so incredibly cute in color and pattern, they’re awesome to use. They’re super absorbent, quick to dry and you can just throw them in the wash to reuse them over and over again. At four in a pack, each cloth is 12 in. x 12 in. (30 cm x 30 cm) in size. Available at various
Marc’s Stores.
(more…)
by Yvonne | Apr 29, 2010 | Natural Living
Last week marked the 40th anniversary of Earth Day, a day in which we as a world community are reminded of the need to protect, save and maintain all aspects of a healthy Earth. As Muslims, we know that every day is Earth Day because Islam is deeply rooted in ecological conservation and biodiversity. Read more on this topic in the article I wrote for Muslim Voices called Green Earth, Green Islam: Be Eco-Friendly the Halal Way.

I decided to go very green while balcony gardening this year. I didn’t want to invest in more clay or even plastic pots because I know I have some around here in storage and I don’t need any more. Besides, I’d read somewhere that you can actually grow seedlings in eggshells. Could it work? Would it really work? Would I have to have special soil? What if I don’t clean the eggs out well enough, will that affect the growth of the seeds? Then I just decided to say “bismillah” (In the name of God) and get started.
Every time I made eggs (which is a lot in my house), I rinsed out the eggshell with water and then placed them back in the refrigerator in the egg carton until I had a carton full of clean, empty eggshells.

Because it’s still not time to plant warm weather crops outside, there is time to grow things like tomatoes indoors. I decided to plant sugar lump tomatoes and tomatillos, or green tomatoes.

Place the tomato seeds into the eggshells with tweezers to make sure you don’t lose the seed. I planted 1-2 seeds per eggshell to make sure once they grow, they will not be overcrowded. I used a permanent marker to label each of the shells so I can remember what type of seed is in each one. It really helps when transplanting.

Next, I watered the seeds gently, careful not to drown them, and covered them with more planting soil. The last thing I did was to keep the egg carton open (you can cut the lid off if you like) and placed an unused shower cap (I get packets of ten at my local dollar store) over the top of the eggshells. I then placed the entire container in front of a sunny window in a relatively warm area of my home. During the day the seedslings get some sunlight and because they are covered, they are retaining heat and gaining necessary moisture.

What I’m most excited about is seeing the first seedling sprout up into the air, leaning towards the direction of the sunlight. Subhanallah!

So what do you do when the plants are strong and ready to be transplanted to another, more permanent container or in the garden? The eggshells can be taken directly to the container and crushed into the new soil, as it will be a great compost. Alternatively, if you have two seedlings that need to be separated, you can crush the eggshell to get to the soil and send the shells to the compost. No toxic materials used or disposed of and your ‘container’ is 100% recyclable. alhamdullilah.
After my eggshell containers were snugly placed in front of a sunny window and nurturing my seeds, I took another trip to the Chicago Botanic Garden, one of my favorite local spots to get inspiration and relaxation. I visited the herb garden to see how their tomatoes are planted and growing and here is the result. I hope mine will also grow to be that happy and healthy, insha’allah.

Beautiful, healthy plants at the Chicago Botanic Garden


Cold frames at the Chicago Botanic Garden. I really hope to have one of these some day, insha’allah.