Processing Summer Garden Tomatoes

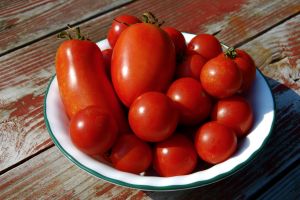
Just as soon as spring approached, we began contemplating what to plant in our summer garden. The consensus was that we wanted plenty of homemade tomato sauce all winter long, coming from fresh, organic produce. After renting a plot from our local park district, we made calculations and designs for our 20 x 20 space (which was actually a bit larger once we saw it). We planted 25 tomato plants, 20 basil plants, 2 thyme, 2 oregano, 1 marjoram and 2 globe basil plants. Needless to say, we’ve been making a lot of pesto, tomato sauce and numerous other things that can be made with these vegetables and herbs.
-
a large pot or two, depending on how many tomatoes you have
-
a colander or large strainer
- ice
-
large bowl
Instructions
Step 1) This is not by any means a necessary step. I just happen to have learned that it is so much easier to skin the tomatoes after they are boiled if you have cored them first. If you already have a tomato corer (available at food specialty or kitchenware stores), by all means use it. I simply use a paring knife.
Step 2) Bring a large pot (or two) of water to a rolling boil, which means you should see the bubbles rolling around in the water in a continuous boil. It’s a good idea to start the water while you core the tomatoes.
Step 3) Add the cored tomatoes to your pot(s). In about 2-3 minutes, the tomato skins should begin to crack. Remove as soon as the skin cracks, as you don’t want to cook the tomato. Once they begin to crack you should be able to see just a bit of the pink flesh of the tomato.
Step 4) Begin preparing the ice bath as soon as you drop the tomatoes into the pot of boiling water. I like to use large ice bags for this project, as it is quicker to refill than using small ice cube trays. If you have an ice machine on your refrigerator, that should work just as well. Be sure your ice bath bowl is large enough to fit as many tomatoes as you you’re boiling, as they tend to be done around the same time and you don’t want them to sit in hot water any longer than they need to.
Step 5) Add the cracked tomatoes to the ice bath and let sit until cool, about 1-2 minutes, but not much longer. When it no longer feels hot to the touch, it’s ready to be peeled.
Step 6) Proceed to move the tomatoes to a colander or strainer, as some juices and water may flow out.
Tomatoes can stay in the colander until you are ready to process further, but should not exceed a couple of hours.
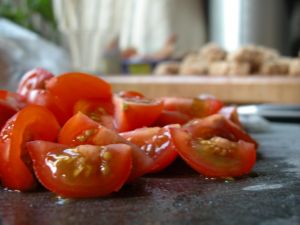
I decided to crush the tomatoes with a potato masher in order to make a chunky tomato sauce. You could opt to skip this step and simply freeze the peeled tomatoes as-is until you are ready to decide how you want to use them. In my case, I sauteeed onions and garlic in olive oil and added this beautiful sauce to a pan. I simmered for several hours while in between I added freeze-dried basil, dried thyme and oregano, a dash of cinnamon, sugar and a pinch of salt. The sauce keeps for several days in the fridge. I used it the next day on angel hair pasta mixed in with ground turkey. Yummy!
Please leave your ideas or suggestions in the comments box. I’d also love to know if this step-by-step illustration was helpful to you.


Responses